Ironically, the last blog post I made (What’s in a Face?) was all about the powerful meaning I find in drawing someone’s portrait. I say ironically, because the next several blog posts I make will be ALL about portraits!
I’m in a Life Drawing/Plein Air Painting class in graduate school, and we are spending several weeks drawing charcoal portraits from life. This is really my first time revisiting life drawing since I took it (with the same professor) during my undergraduate degree, and again I find it to be an exciting, invigorating, and often frustrating challenge.
Drawing or painting from life is not the same as drawing from a picture. Our brains process and interpret information much differently from the real world than from a flat, two-dimensional, processed photograph. We are forced to translate the three-dimensional onto our paper using brush or pencil, and the results are often surprising.
Drawing Process
This week’s focus was on the accuracy of the drawing, specifically proportions. There are a few methods of checking proportions which come in handy when drawing from life, and we were to implement these during our drawing session, correcting inaccuracies and determining which techniques we found most useful.
To begin my portrait, I always start with a very light line drawing using graphite or colored pencil. I’ve been using the Reilly method of constructing a proportionate head, which forces me to focus on how the parts correlate as a whole rather than individual feature placement. Using this knowledge of symmetry and accurate proportions of the face, as well as sight measurements from my model, I quickly sketch the head, hair, features, and some blocks of light and shadow.
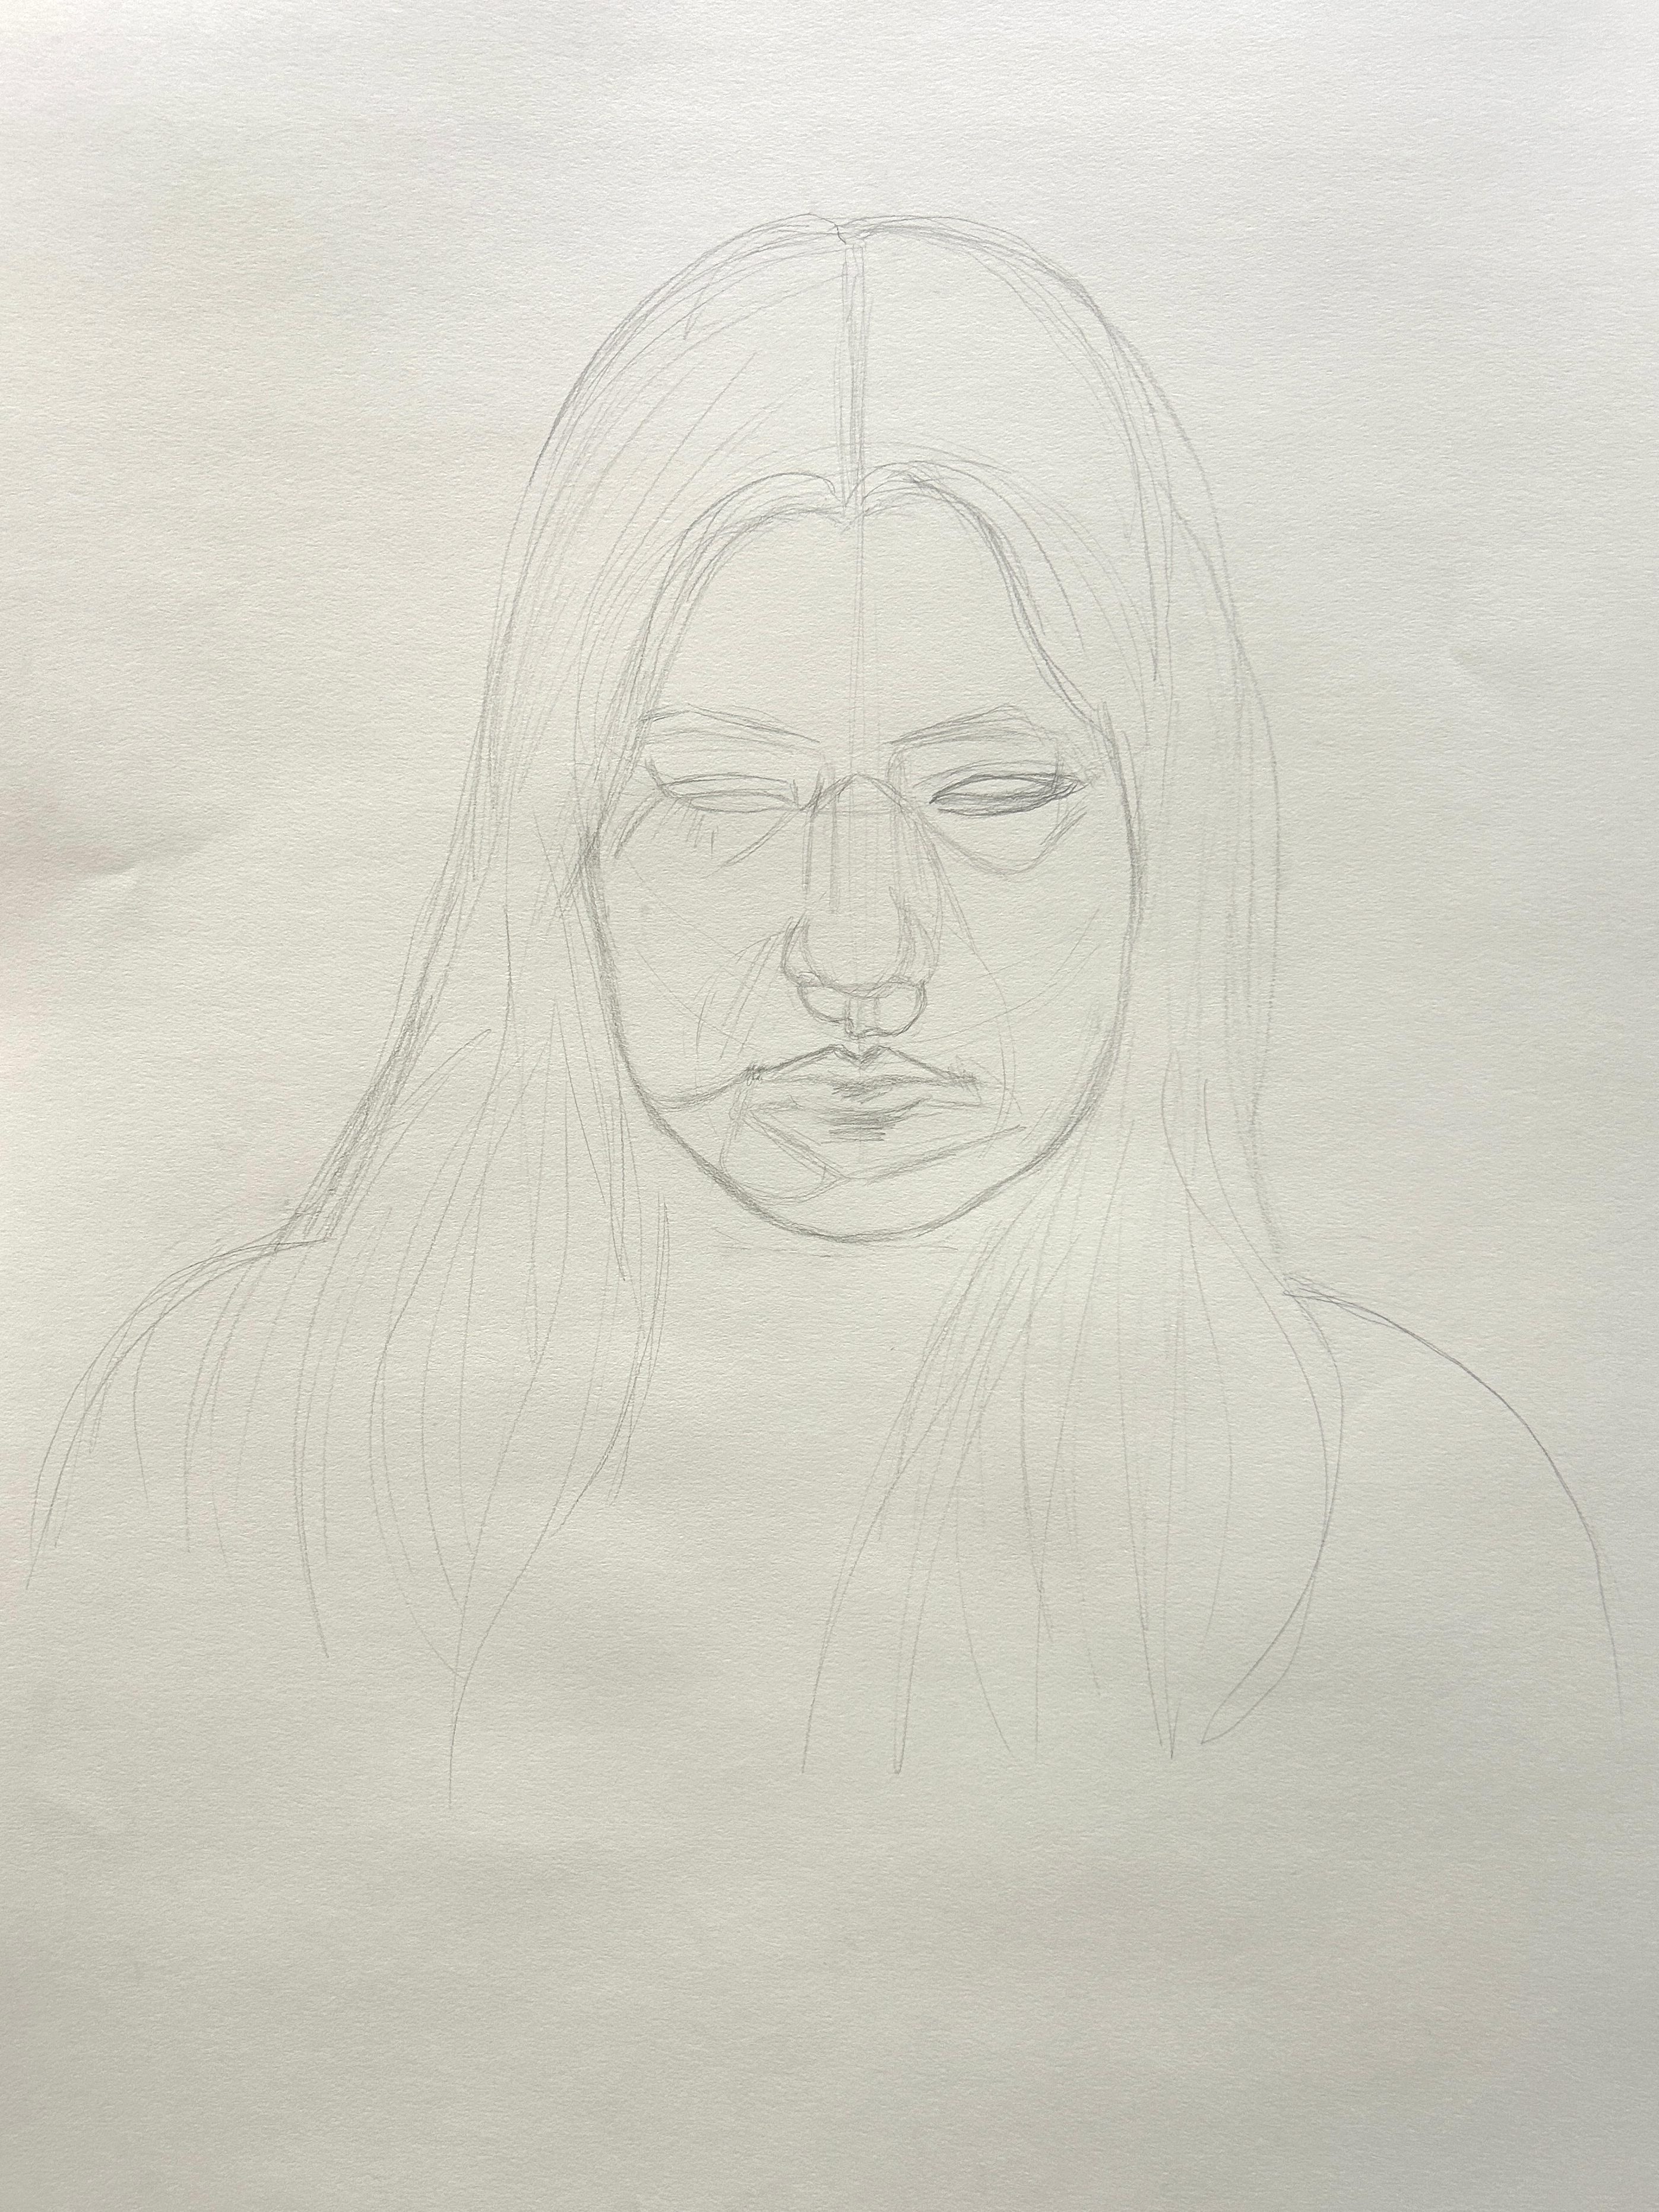
From there, I begin mapping out my values with charcoal, beginning with the darkest tones. I always tend to be too light with my overall value pattern, so I’ve been aiming for more contrast. At this stage, the lighter parts of the face are still untouched. As I work, I continue checking my accuracy and proportion measurements using sight measurement and the plumb line method (using my pencil to compare/determine placement of features from model to portrait). During breaks between sessions, I also take photos with my phone to check the mirror image for errors.
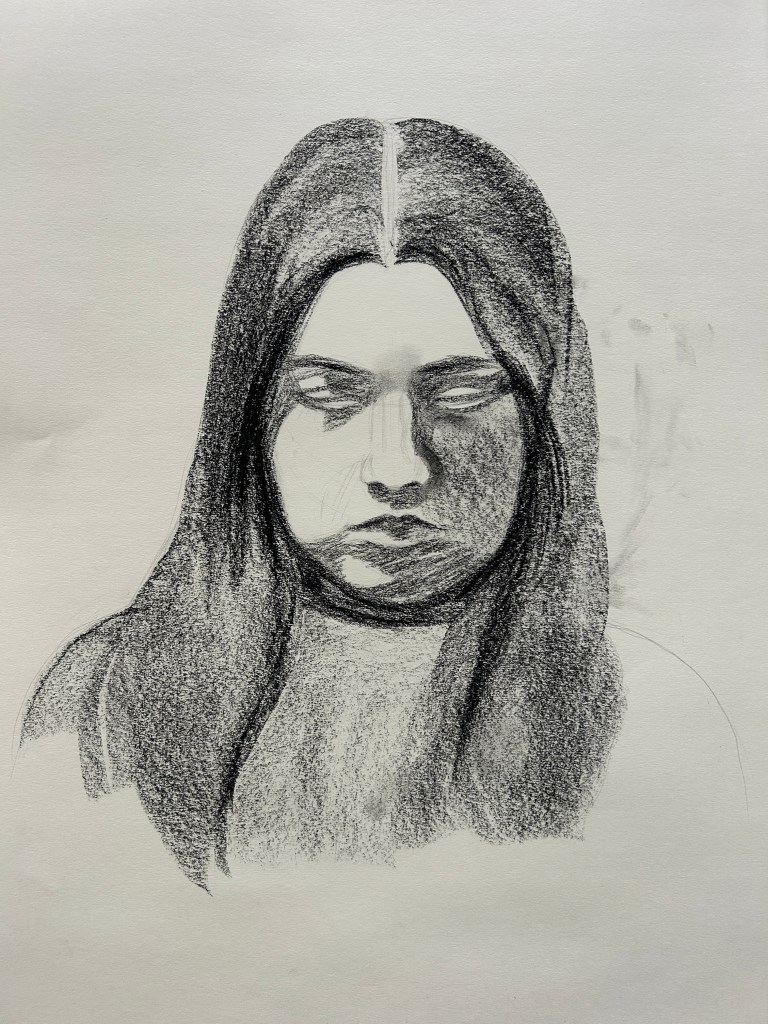
Next I use my hand to sweep charcoal from the shadows into the lighter side. This allows me to quickly establish those values without adding any more charcoal. I then begin bringing the features out and giving them some definition.
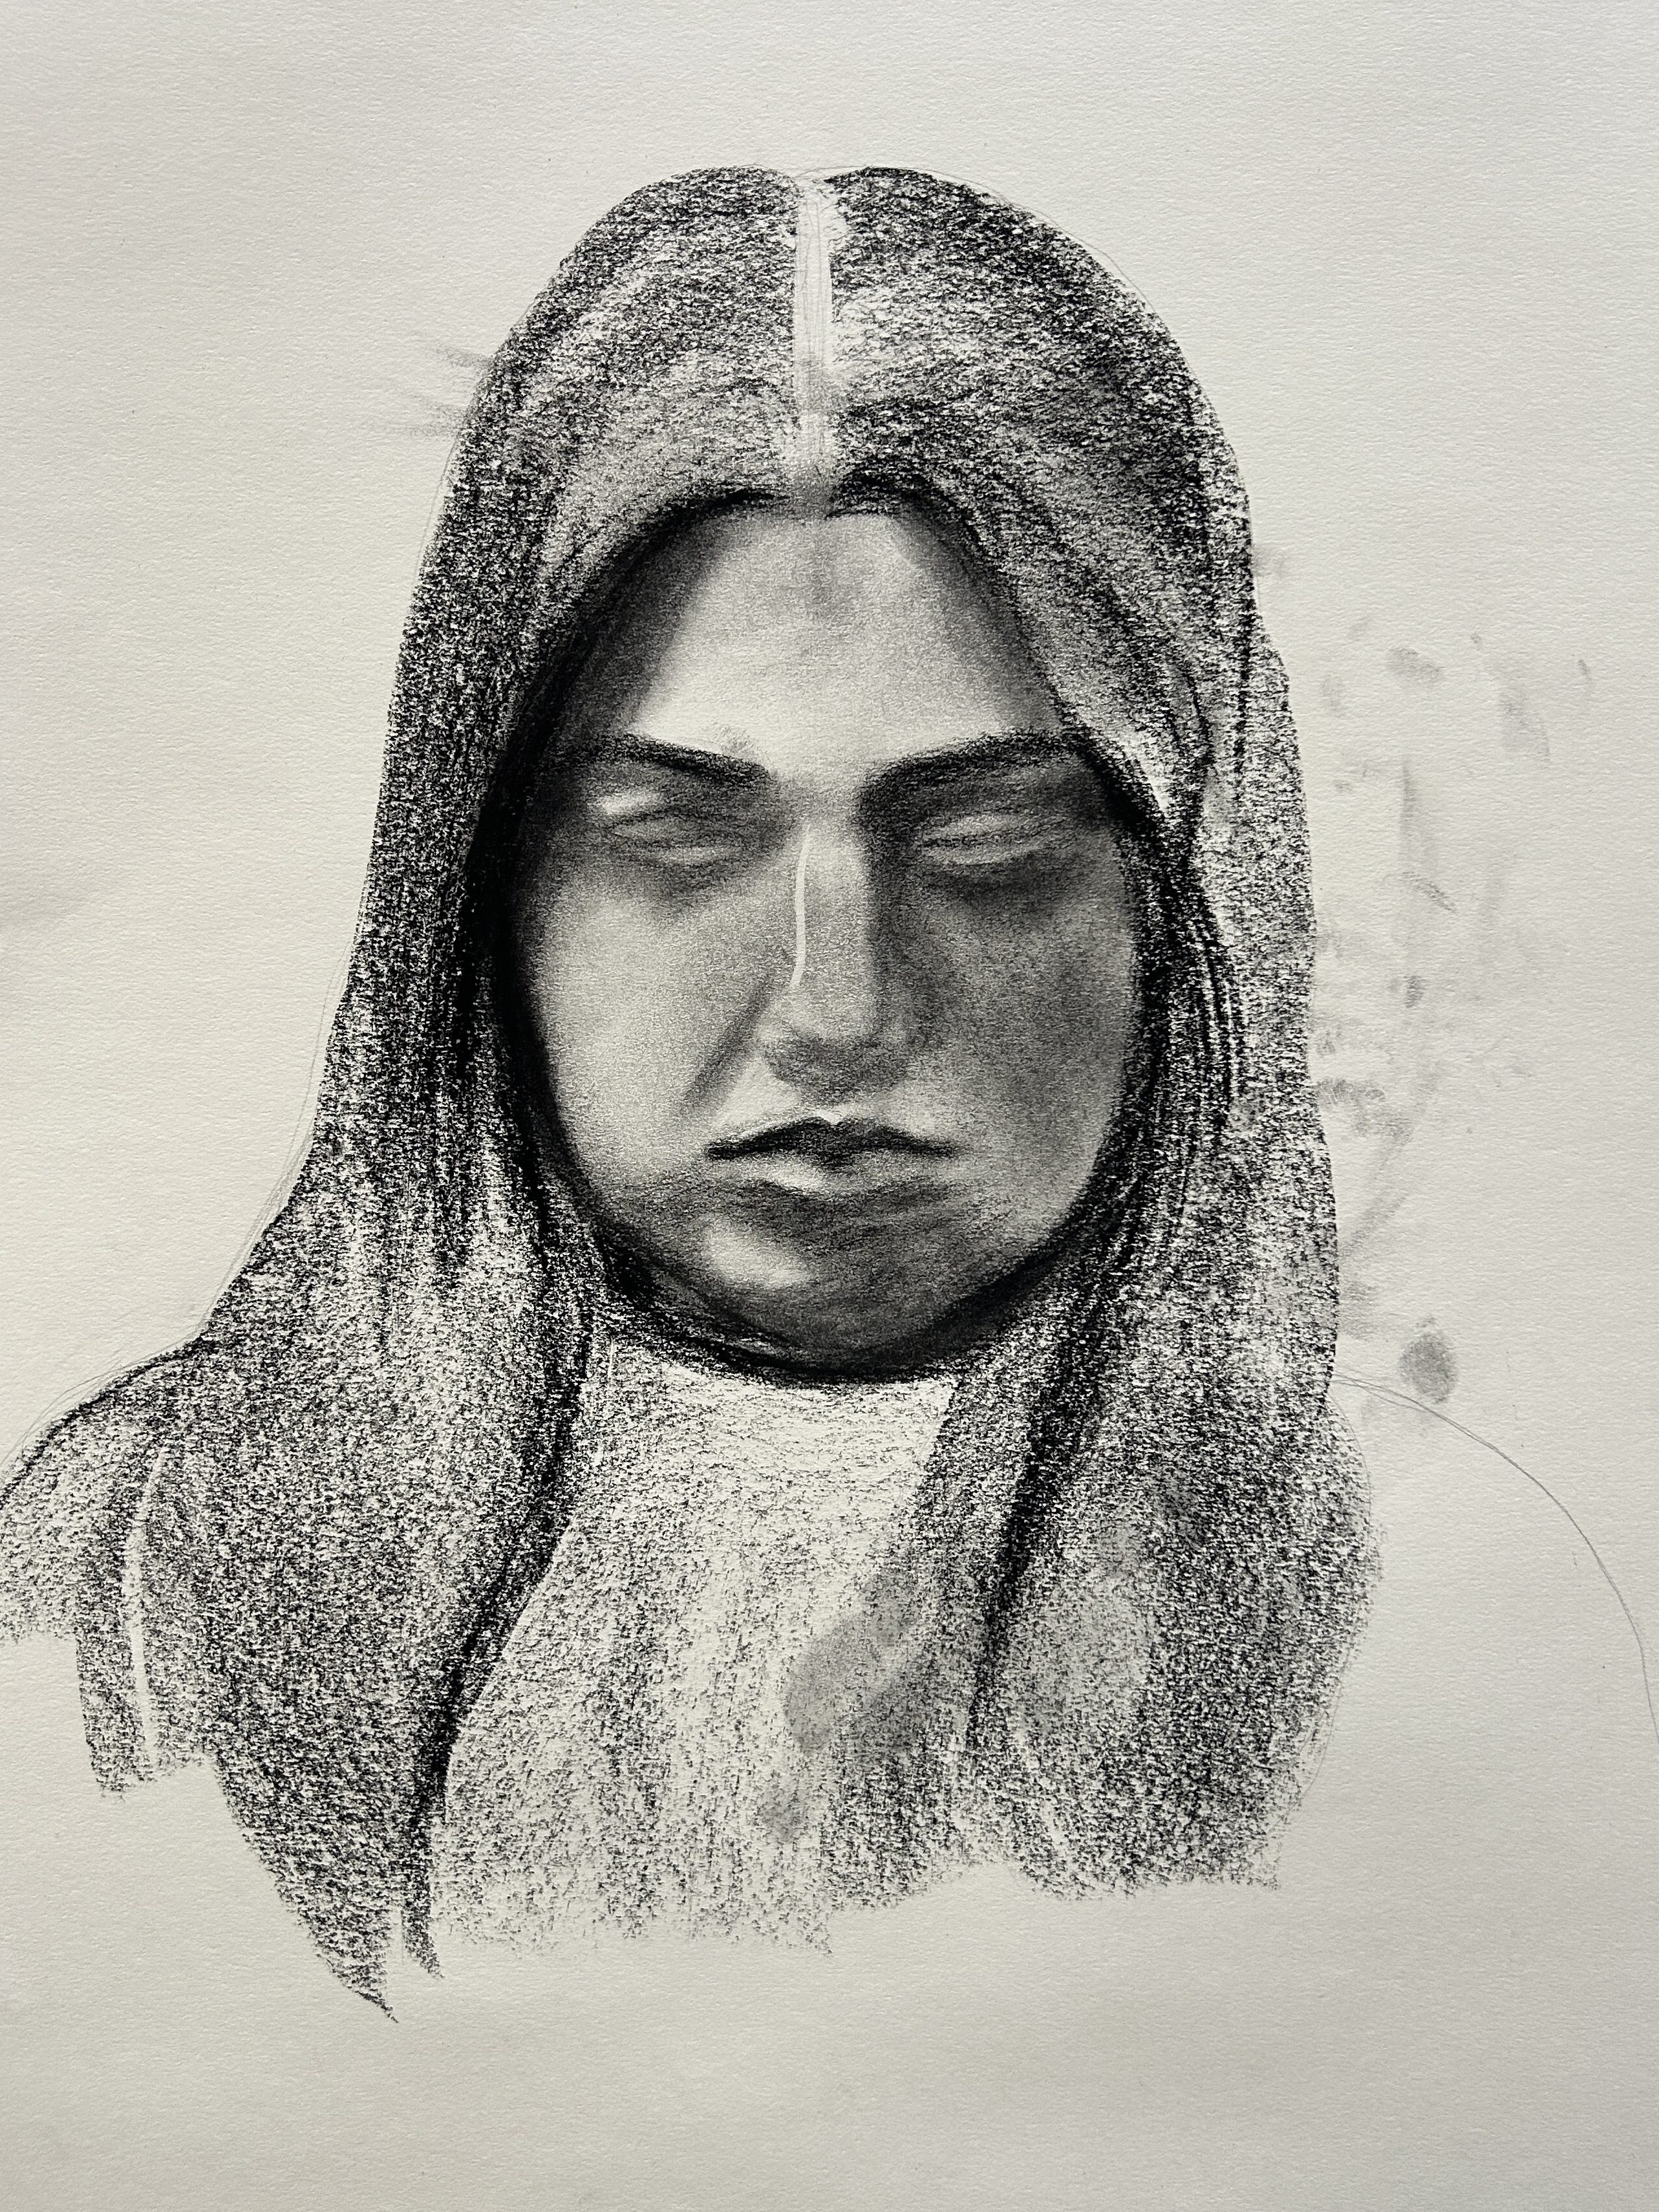
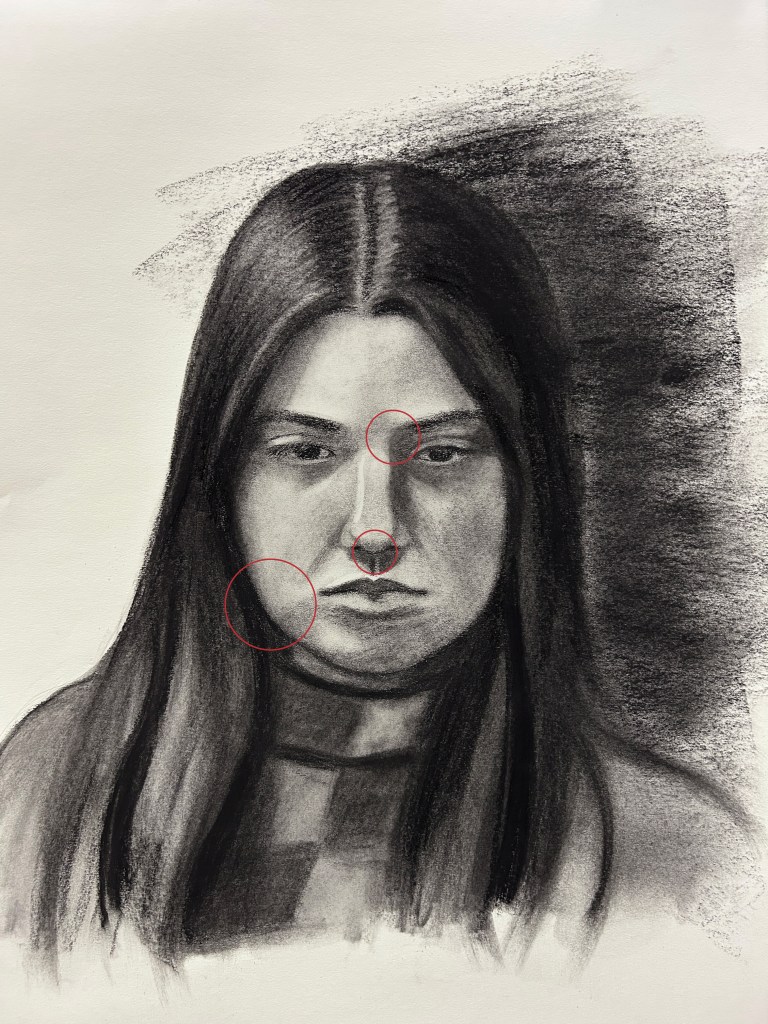
At the next stage I continue working on the hair, which improves contrast and starts bringing the portrait to life. Checking proportion accuracy as I draw reveals numerous areas that need work, as you can see in this image:
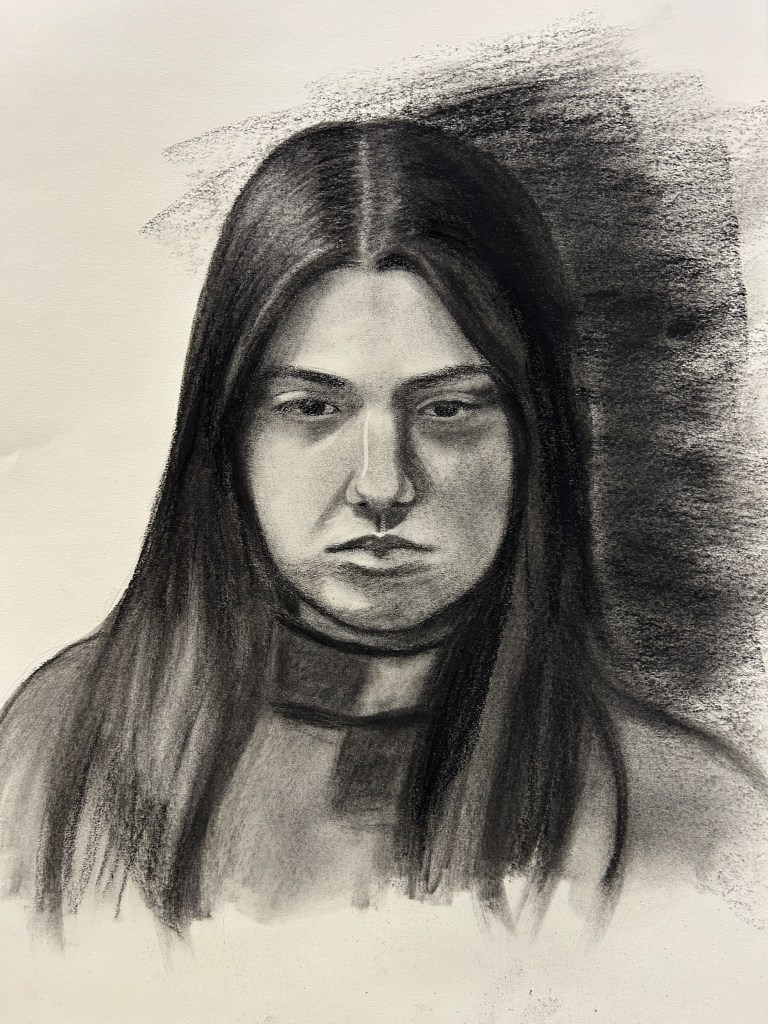
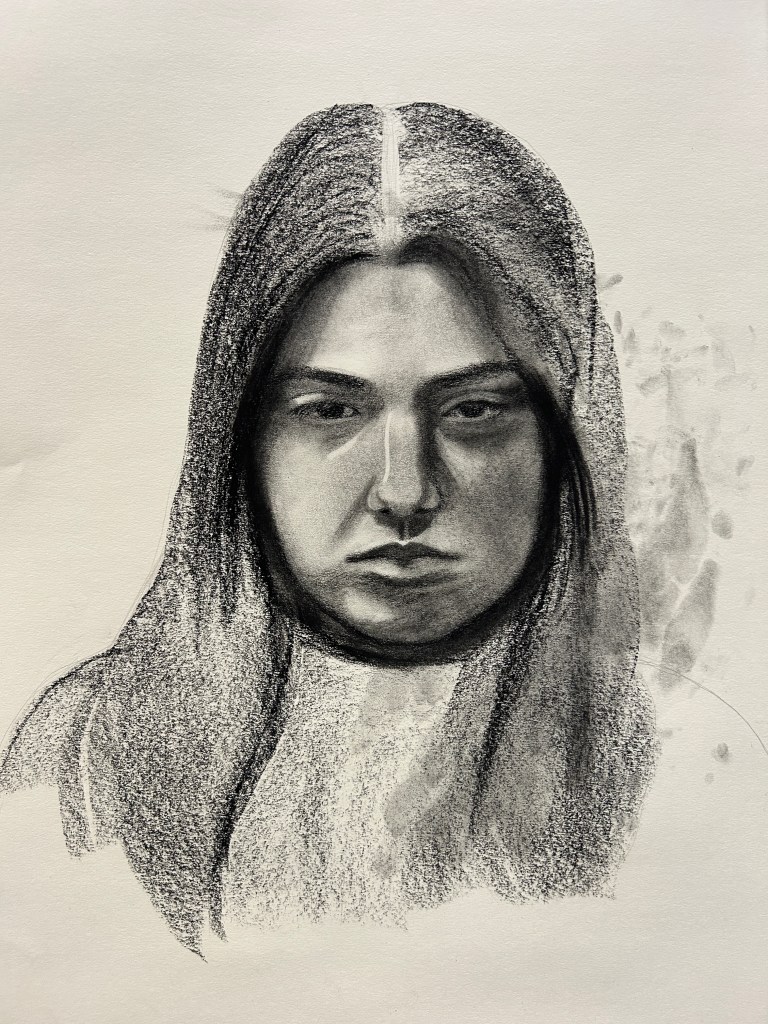
The width and bottom of the nose need adjustment, and checking the mirror image reveals that one side of the jaw is very disproportionate. I revise these errors during one of the last sessions with our live model and continue to refine my final drawing in the studio.
Reflection
I am always challenged by drawing from life, yet it is a challenge I enjoy. The three areas I find myself wrestling with the most when it comes to drawing charcoal portraits from life are accurate proportions, value contrast, and likeness.
A little bit of everything!
Our professor reminded us last week that establishing the likeness of a face is “the last five percent” of our drawing. The biggest obstacle to overcome first is drawing a face with accurate human proportions, a face that looks convincingly real. If we don’t establish accurate proportions, we cannot successfully achieve a likeness.
This was encouraging, because I find it much harder to replicate likeness when drawing from life as opposed to drawing from a picture. As I said before: the difference is immense.
So, accuracy: this is where the learning comes in. Using our textbook (How to Draw Portraits in Charcoal), I’ve better acquainted myself with efficient techniques for working in charcoal, using the versatile qualities of this medium to my advantage when drawing.
I started practicing the Reilly method (also taken from that book) to quickly establish the proportions of the face.
I checked proportions using the plumb line method, sight measurement, and mirror images while drawing the model, finding new errors every time: in the symmetry of the face, in the eye line, in the shape of the nose, in the width of the chin. The angle at which I viewed this model presented an additional challenge, since she was almost directly across from me but ever so slightly turned and tilted to one side.
And guess what? All of these practices helped. I am constantly in need of the reminder that slowing down, taking time to learn and glean wisdom from the masters of my craft who have come before me, discovering new techniques, methods, and processes—all of it strengthens me as an artist. I don’t need to be frustrated if something doesn’t go as well as I’d hoped, or if I want to be better than I am—I can simply keep learning and growing and sharpening my skills.
And that is the whole point, isn’t it? We don’t create to reach ultimate perfection.
We create the work because we love the work. Because it’s good work, and because God made us to love it, just as He loves His.
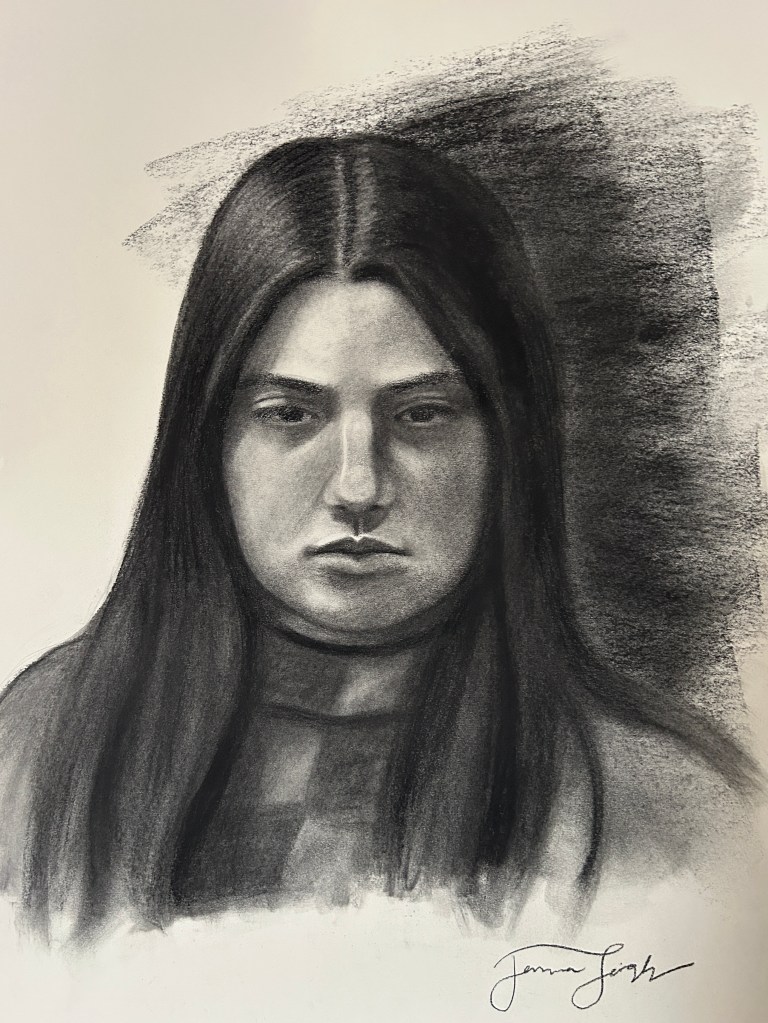
So stay tuned for more upcoming charcoal portraits and more reflections on growing, learning, and becoming as I work on my MFA in Studio Art. Thanks for reading! (And thank you to my lovely friend Elise, who sat still for a very long time so we could draw her! Don’t worry; she is a very happy person in real life. It’s hard to smile when you have to remain completely still for three hours.)

Leave a reply to Charcoal Portraits Week 4: Quality of the Light – Jenna Leigh Design Co. Cancel reply